Making a 3d model into a Gear VR app
In this case we wanted to turn a 3d architecture model into a VR experience.
Get your 3d model ready
I downloaded a free sample from http://tf3dm.com/3d-model/interior-room-72962.html Unity can import exported formats such as .obj, but also some proprietary formats (Maya, 3DSMAx, Blender…)
Import to Unity
- Create a new 3D project
- Go to
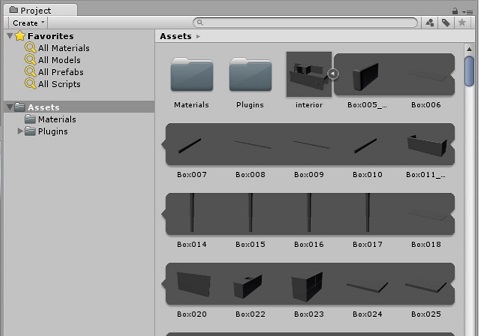
Assets > Import New Asset...and locate your model - It will show up in your Asset folder
- Drag and drop onto your scene
- Adjust your camera position/angle :
- move your view the way you want it
- select the Main Camera object
- Go to
Game Object > Move to view(Ctrl+Alt+F) - Go to
Game Object > Align with View(Ctrl+Shift+F)
Update project settings for VR
- Go to
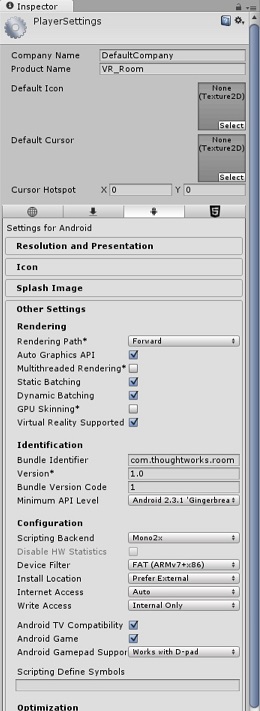
Edit > Project Settings > Player - in the Inspector panel, click on the Android button, then under “Other Settings” check “Virtual Reality Supported”
- in the same panel, fill in “Bundle Identifier”
Get a signature file
To run VR apps in the GearVR you need a signature file linked to your device or you’ll receive the following message at runtime: thread priority security exception make sure the apk is signed
- find out your device id
- there’s an app for that
- on MacOS, connect your device to your computer and run the command
adb device - on Windows, you’ll have to dig in the device manager (tutorial here)
- Once you have your device id, go to https://developer.oculus.com/osig/ and generate the file
- save it to
/Assets/Plugins/Android/assets/
Build your app
- connect your phone
- go to
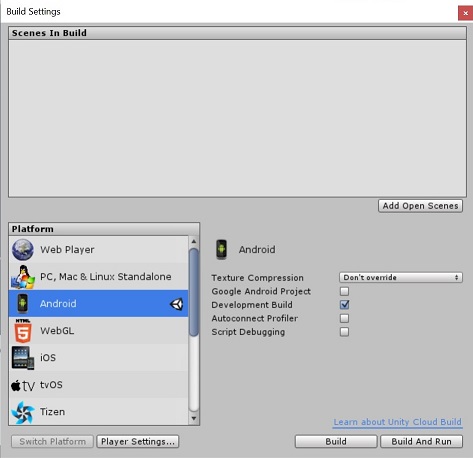
File > Build Settings...and select “Android” with “Development Build” checked - click Build, doesn’t matter where you save the file
- your phone should be detected automatically and the apk pushed directly onto it
Run the app from your phone
- tap the newly installed app
- you might have to install the GearVR app and tap “Allow” when prompted with security dialogs
- Once instructed, attach your phone to the GearVR and enjoy your VR room